Recycling filing cabinets as planter boxes...
Being a Landscape designer, I am often specc'ing products into my clients gardens that I can rarely afford myself. One of my big loves is rusted steel planter boxes. I custom design these to fit into particular spaces, and they take up a lot less room than building in a brick version. The offer a great contrast to other surfaces around them and the thin nature of them means more soil and space for the plants.

A steel planter that I designed into a TDL garden. This one hides an ugly junction between retaining walls.
When I purchased my little town house with its tiny courtyard, I knew I wanted to plant bamboo, to provide a little privacy, but also to block out the ugly walls of the two storey townhouses. I wanted the bamboo to be in planters so there was no fear of them getting out of hand, or growing into neighbouring gardens. So of course steel planters were the perfect solutions. But there was no way I could afford the outlay to purchase the number required to put around the perimeter of the garden.
Pinterest to the rescue! I was scrolling through one day and spotted an old filing cabinet that had been spray painted a bright colour and it was filled with home grown veggies.....yum.

Found on Pinterest. Author unknown.
So off to the tip I went, and purchased 3 x 4 drawer cabinets and 1 x 3 drawer cabinet for under $100. Then to Bunnings and purchased some Crommelins Blackseal and spray paint in a hammered brown finish (2 cans per cabinet)

Working out how I am going to lay them out. The kids insisted the ugly water feature has to stay, so Im hoping the bamboo will hide it a bit :)
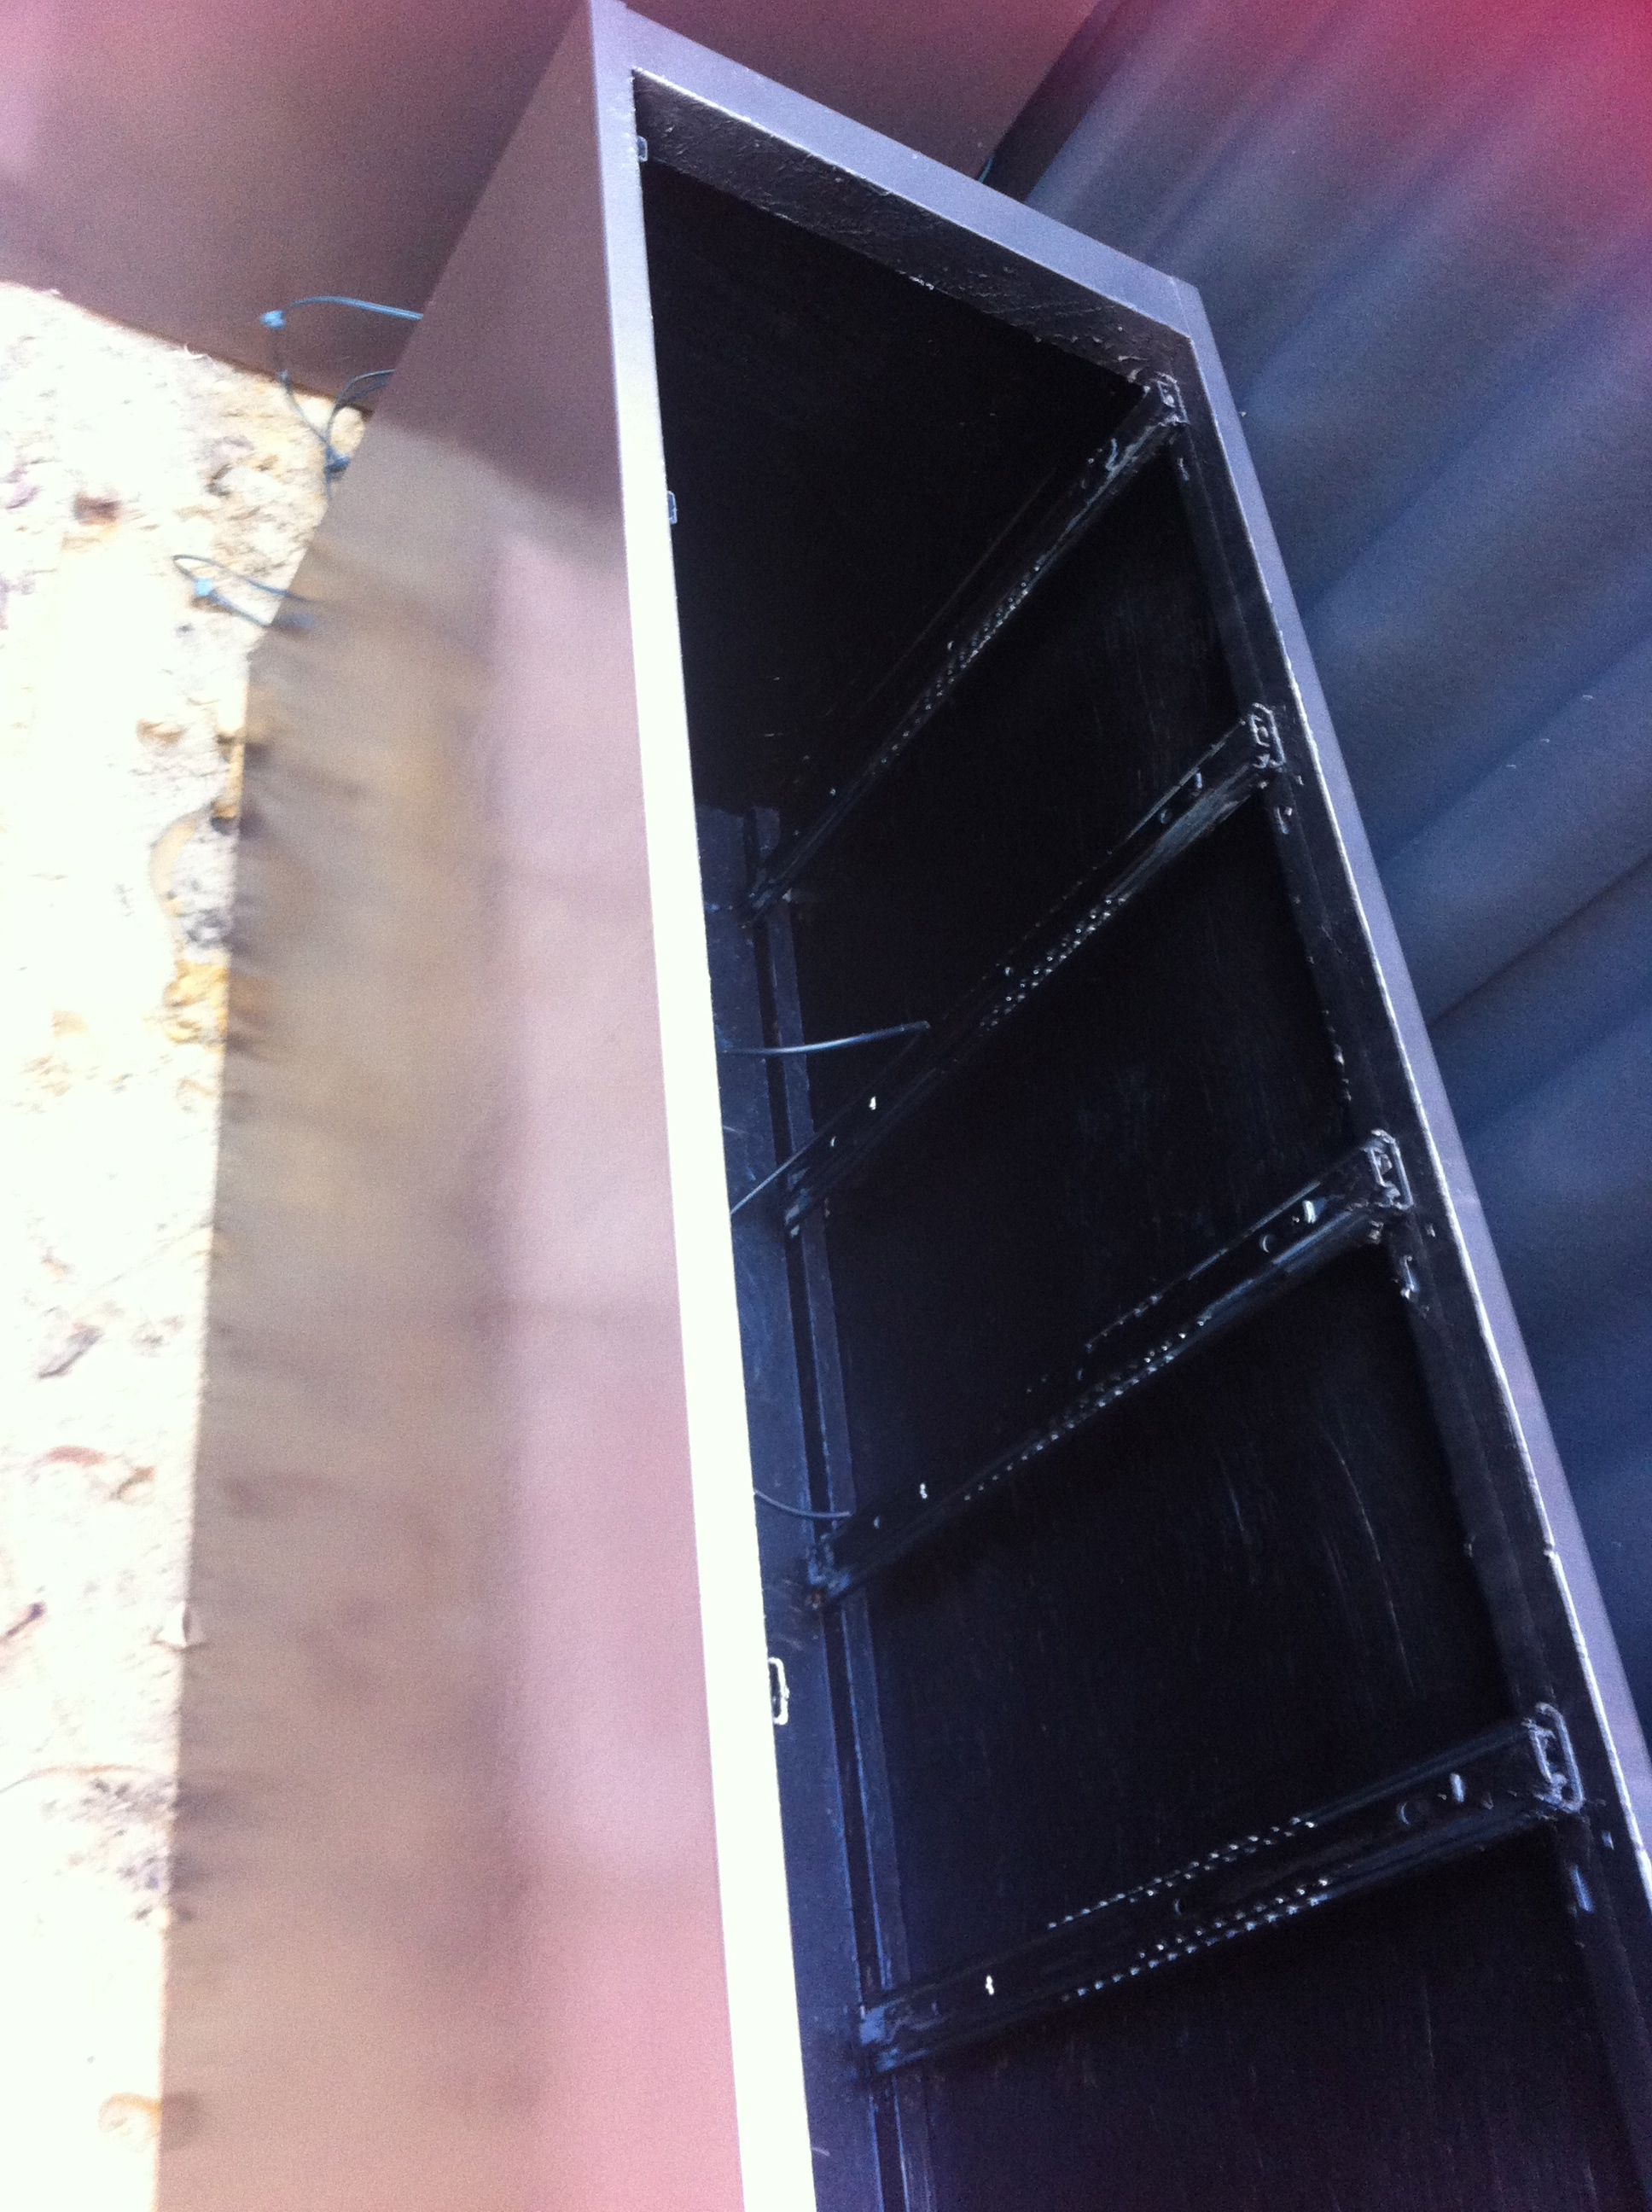
First, I removed and discarded the rails etc, then drilled a heap of holes in the bottom for drainage.
Painted the insides with 2 coats of Crommelins Blackseal to slow down any rusting from the inside out, following the manufacturers instructions.
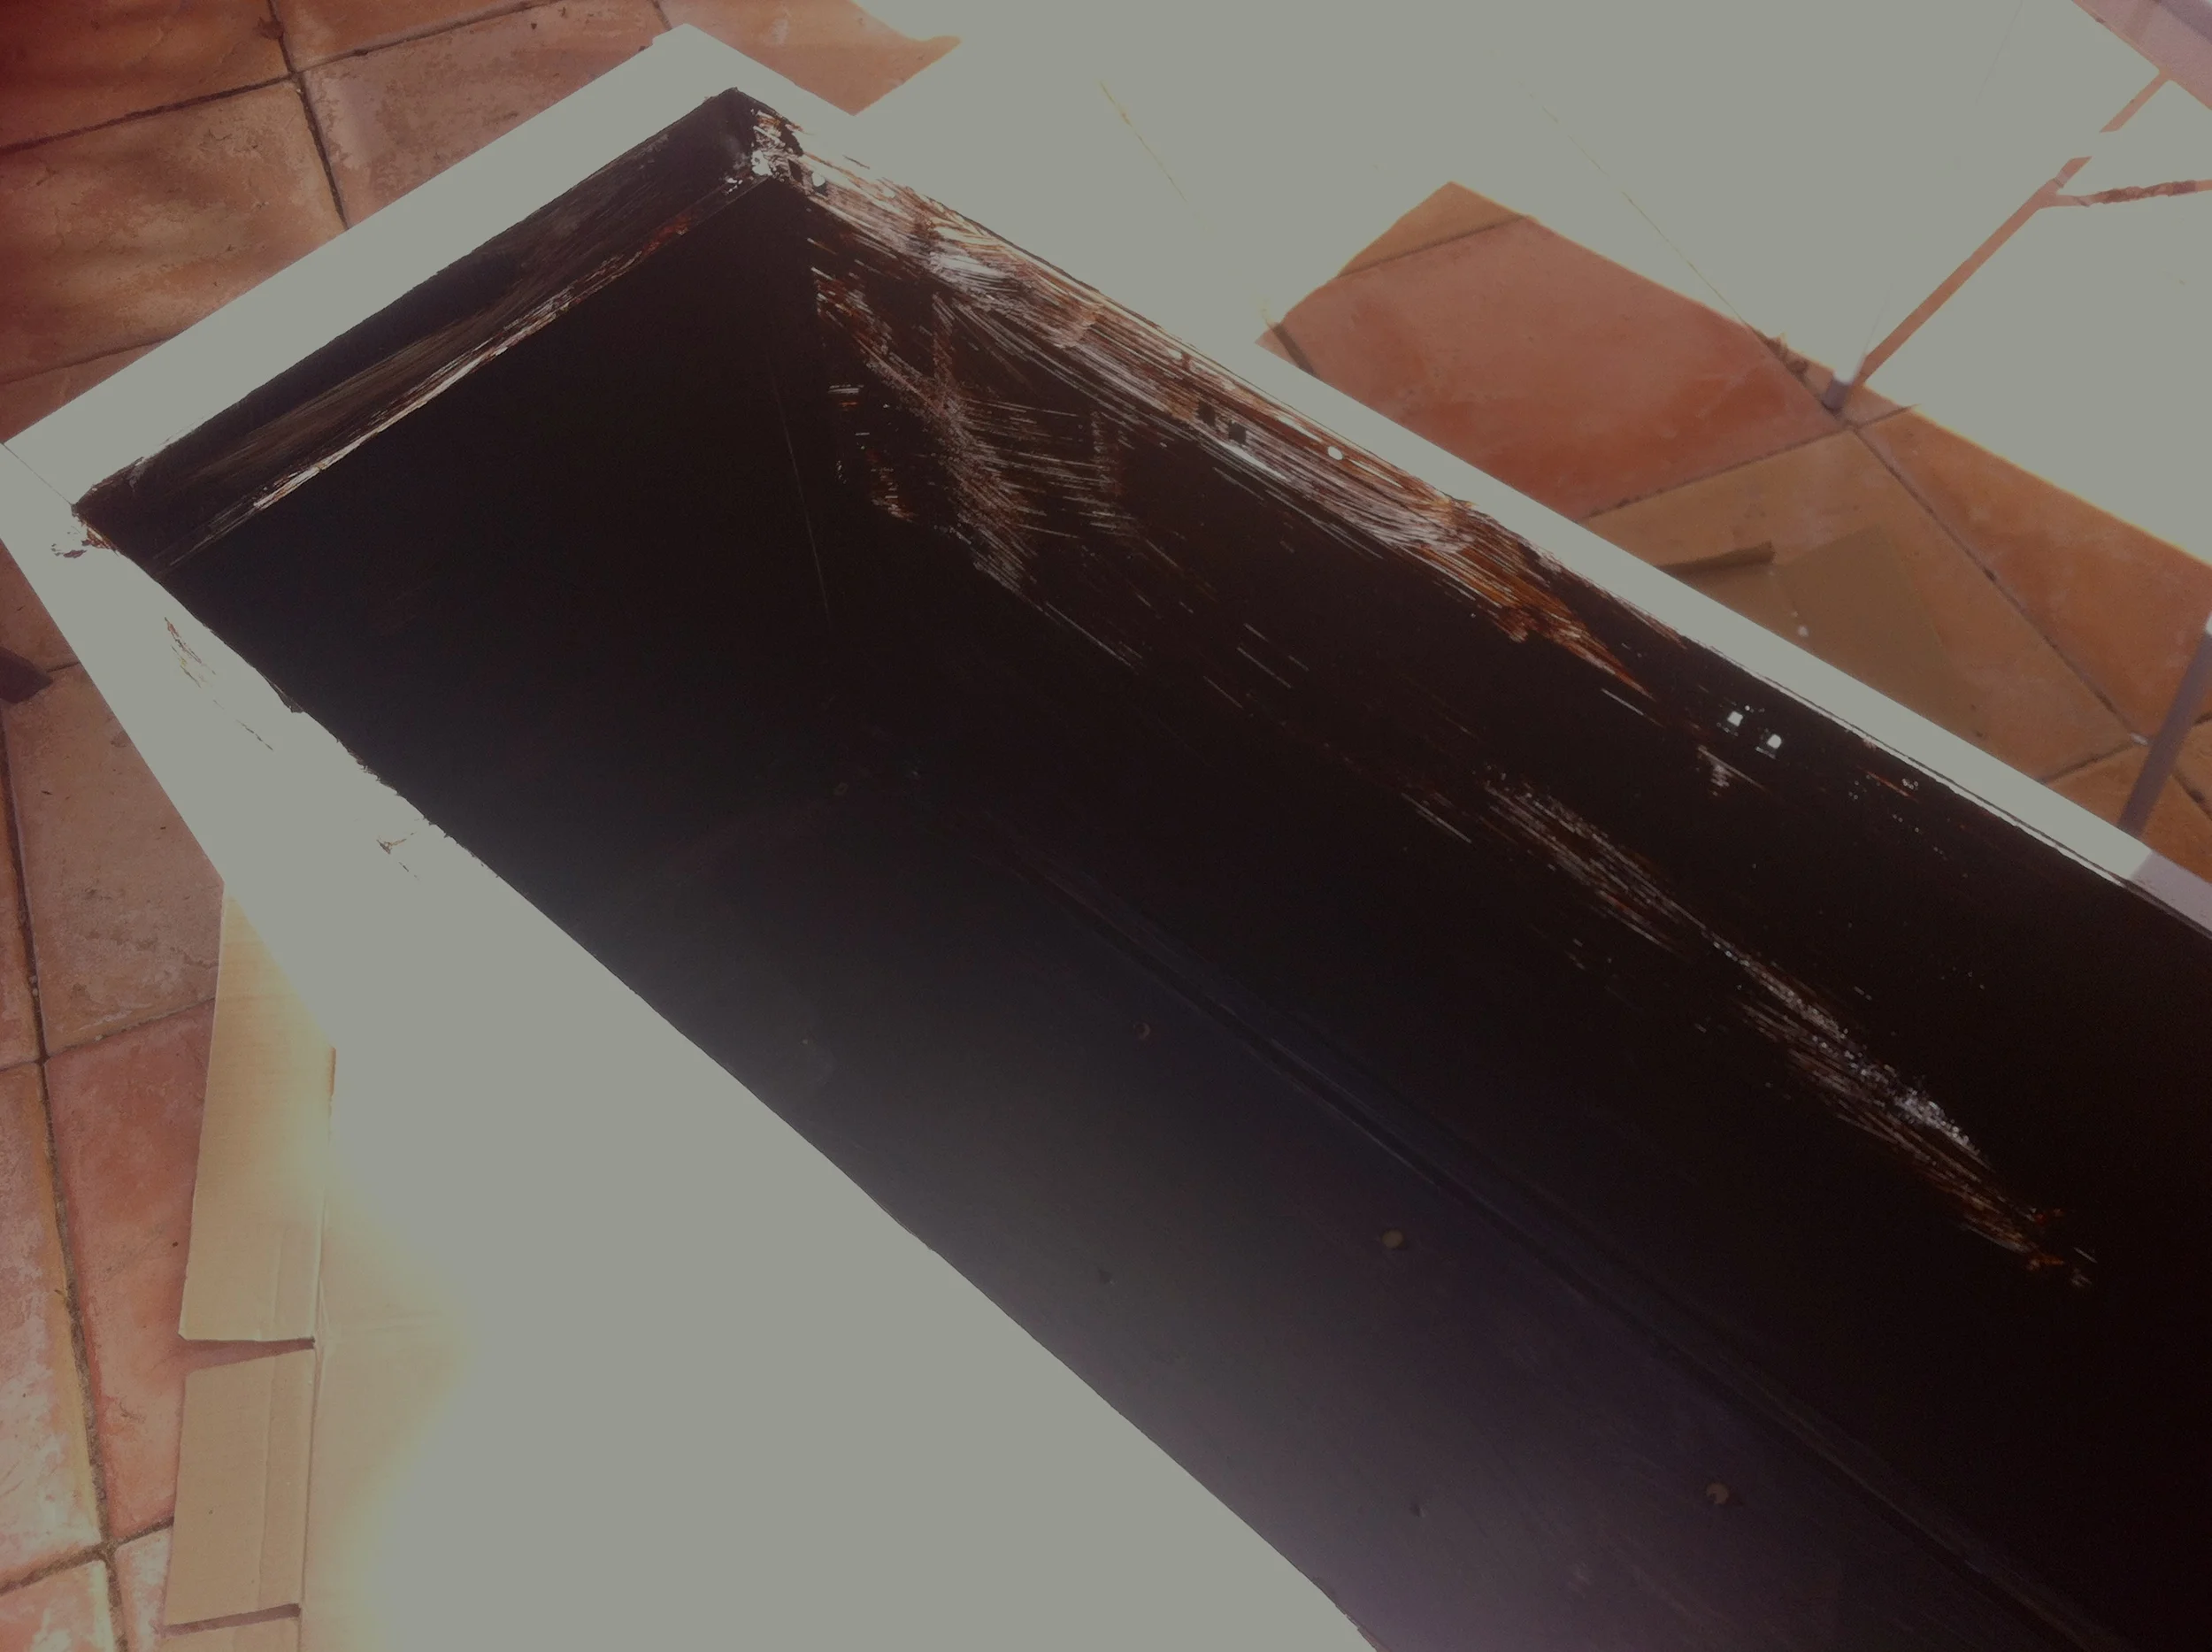
After the first coat. Make sure to add at least 2-3 coats to give a nice thick, even coverage. Sealed with Crommelins Blackseal
Once that is dry, then comes the fun part. Using your chosen colour of spray paint, coat the outside of the cabinets several times. Make sure you get a good even coverage to all exposed areas, again to help protect it from surface rust.

This colour is by Dy-Mark and is in a Hammered finish. Colour Hammered Brown
I then added my drip irrigation. This was fed through one of the holes in the base.
Locate your planters where you want them. Once the soil is in, they will be impossible to move!

A little paint on the fence helped improve the look of things too! Colorbond Monument is a colour I like to use on fences. Once the plants are in place, the fence then becomes the shadow and the plants stand out.
Add you irrigation, when they are all in place
Use a good quality potting mix and add your plants. These are Slender Weavers Bamboo (Bambusa textiles gracilis) which are fast growing, grow well in narrow spaces and get to a height of around 3m.

Some Lirope is added around the base to soften the edges.

One day, this paving will be removed and I will have decking....just one of those things I spec, but can't afford!
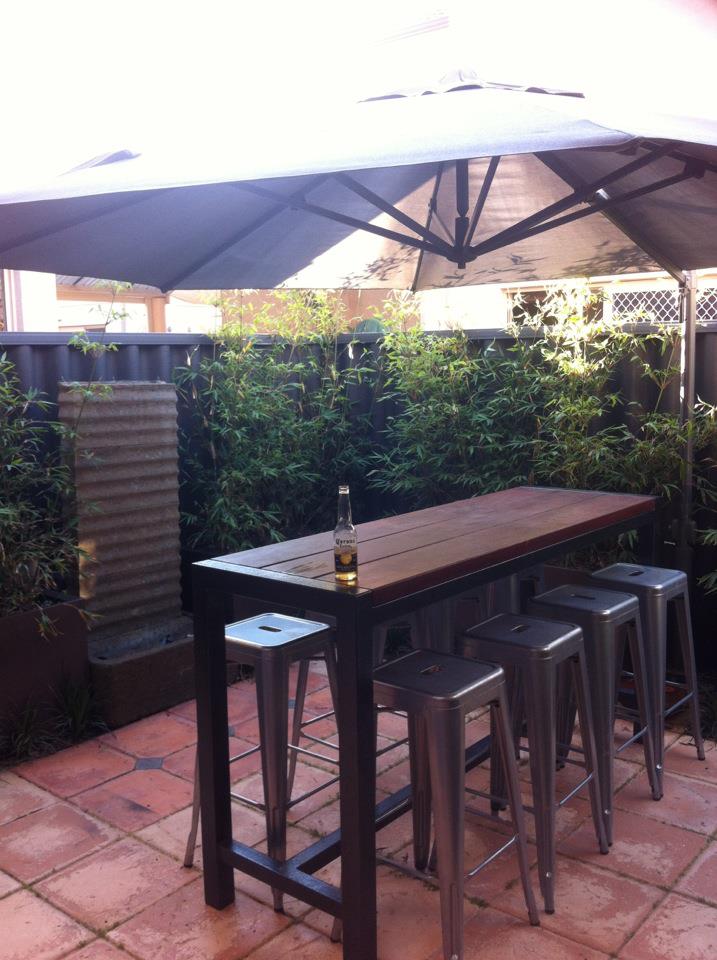
This is how the garden looked after one year...and how we use the courtyard in summer. Umbrella up and an ice cold Corona.
Today (2 years later) some of the canes easily reach 3-4 metres. The Liriope gigantia is going gangbusters and the pots are standing up strong. They could all use a little touch up paint, but rusting is not a problem yet.

Reducing the glare from those apricot coloured walls behind. And notice how the fence doesn't glare out from behind the plants

Kokedama, what, why and how.....
While trawling through through hundreds of Pinterest pictures a few weeks ago (something I like to do while I am having a horizontal moment on the couch) I found the most amazing pictures of hanging gardens or as they are more formally known 'Kokedama'. This of course immediately tweaked my creative interest and I HAD to try making one....or four!
There are a few websites that run through the process of making them and even YouTube videos. But here is how I made mine.
What you need

1 bag of Bonsai mix
1 bag of Peat moss
1 brick of sphagnum moss
1 bag of Richgro Sand to Soil (with bentonite clay) - not shown
string
baby plants - try maidenhair fern, succulents
green moss (available from florist supplies)

Firstly, mix 1/3 of each the bonsai mix, peat moss and clay into a container with a little water. Keep mixing until it comes together to form a ball. This ball should hold its shape if you toss it in the air.

Then you need to gently knock the soil off the roots of your plant. The more you can remove, the better. Then wrap the roots with a small amount of wet sphagnum moss.

Split the soil ball in half and put your root ball inside. Then work the soil firmly around the roots to seal the ball completely.


Then you can start placing large sheets of the green moss around the ball. I quite enjoyed how this felt. I think that the texture reminded me of playing with moss in the bush when I was a child.

Press each sheet on firmly and tear off smaller bits to fill any gaps.

Then start wrapping the ball firmly with the string, winding in many directions to secure all of the green moss. When you are happy with the finished look, and that the moss is secure, tie it off. This one was hanging by the string, but I've started cutting the string off and looping some fishing line through to hang it. For something different, try wrapping your ball in a brightly coloured string.
Sphagnum moss can be used to cover your ball if you are having trouble with the green moss.
Maintenance ... I've found the best way to water the plants is to dip the ball in a bucket of water for a few seconds. Also spray the leaves with a water bottle occasionally.

Ive hung 3 of these in a protected spot near my front door. My visitors see them when they arrive and they are right outside my office window..... Little bit of green in my concrete jungle.